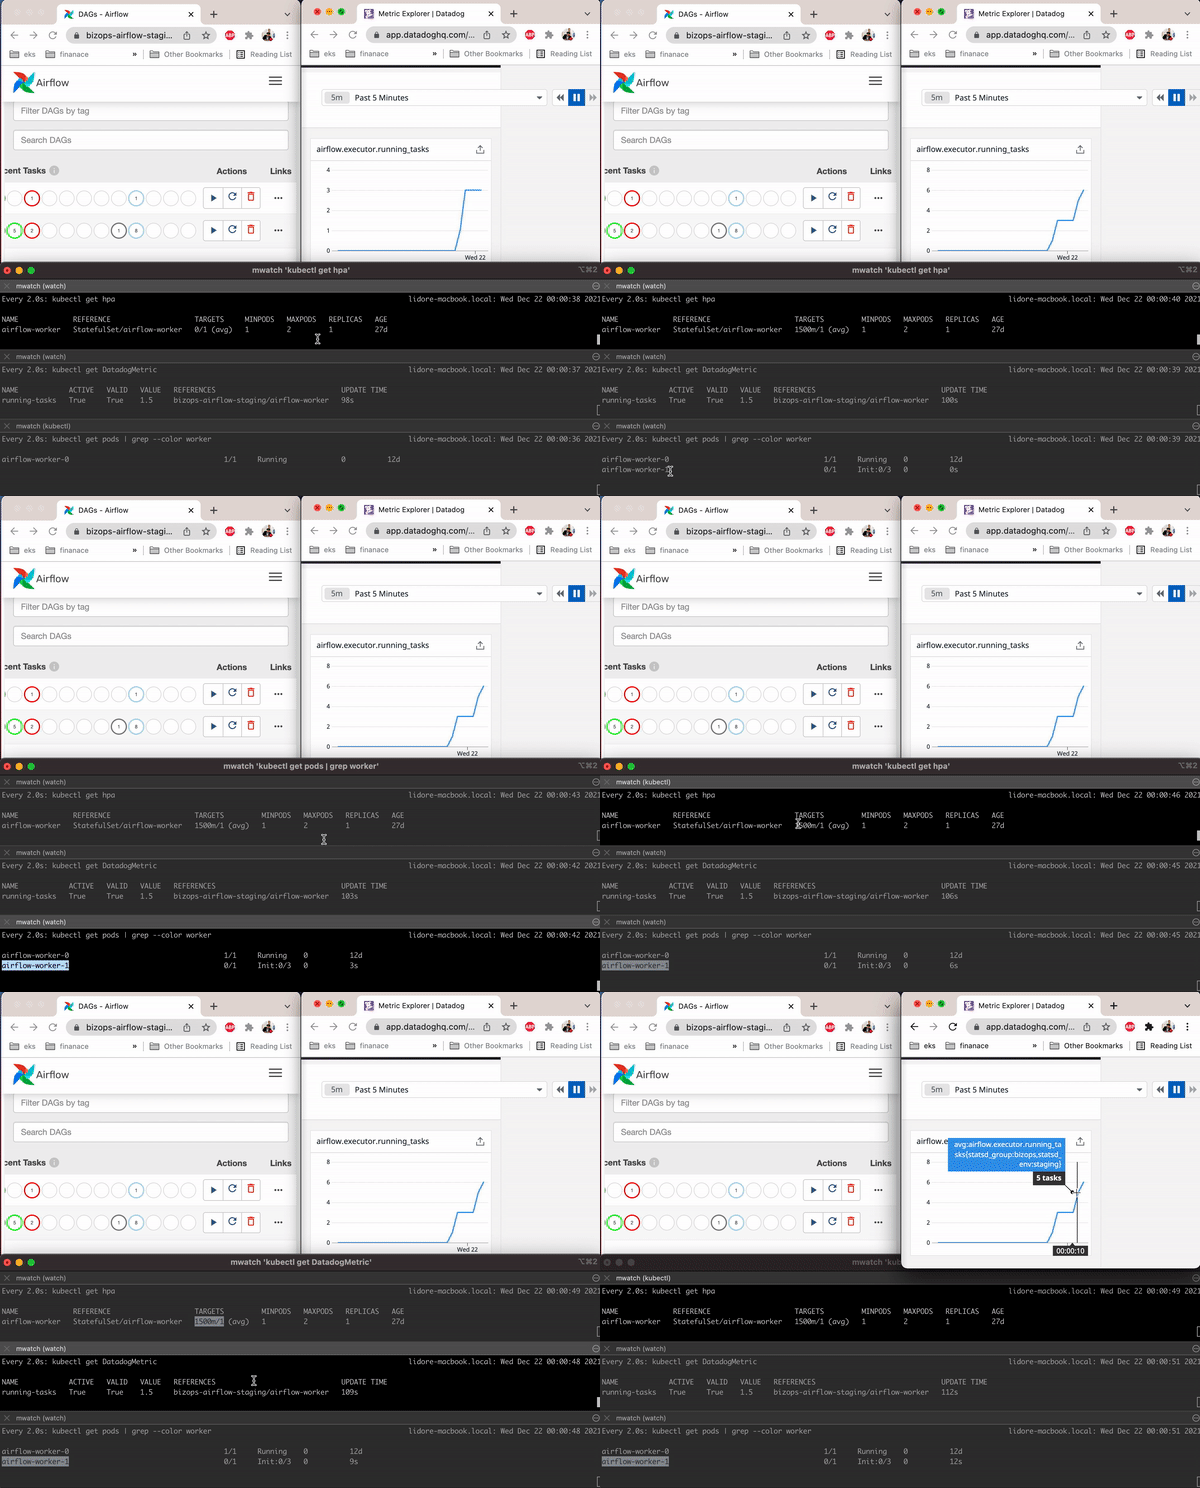
Follow this step-by-step guide and learn how to autoscale your Airflow K8s pods based on ExternalMetrics
One of the strengths of Kubernetes lies in its ability to achieve effective resources autoscaling. To make scaling decisions, Kubernetes requires rational decision-based on service metrics.
In this post we will learn about the scaling decision, and how we can extract, monitor and autoscale Airflow workers based on Datadog external metrics.
Following are the steps one takes in order to accomplish Airflow HPA (Horizontal Pod Autoscaling) within the Kubernetes environment:
- Setup Datadog cluster agent
- Enable Airflow statsd
- Create a Custom Resource Definition (CRD) like
DatadogMetric - Create HPA using the DatadogMetric

Setup Datadog cluster agent
The External Metrics Provider resource made it possible for monitoring systems like Datadog to expose application metrics to the HPA controller. Our scaling policy will be based on external metrics which we collect from our applications.
To learn how to activate and use DatadogMetric, refer to Datadog’s documentation.
Enable Airflow StatsD
Now, let’s configure Airflow to send metrics to StatsD. Our scaling decision metric is the executor.running_tasks. We decided to observe the number of running tasks on the executor and to get a rational decision whether to scale the Airflow workers’ pod up or down.
Step 1: Install StatsD
pip install 'apache-airflow[statsd]'
Step 2: Configure StatsD environment variables:
Decide what metrics to expose by configuring an allowed list of prefixes. Here we choose to send the executor metrics as we are interested in the metric of the running tasks.
[metrics]
statsd_on = True
statsd_host = localhost
statsd_port = 8125
statsd_prefix = airflow
datadog_enabled = true
# Allow List of Metrics
allow_list: executor
# Datadog Tags of the environment
datadog_tags: "statsd_group:datainfra,statsd_env:production"
Create a Custom Resource Definition (CRD) like DatadogMetric
DatadogMetric allows the HPA to autoscale applications based on metrics that are provided by third-party monitoring systems. External metrics support target types of Value and AverageValue.
The Horizontal Pod Autoscaler is a great tool for scaling stateless applications. But you can also use it to support scaling statefulsets.
Following is an example of how to create it using Terraform:
resource "kubectl_manifest" "DatadogMetric" {
    yaml_body = <<YAML
apiVersion: datadoghq.com/v1alpha1
kind: DatadogMetric
metadata:
  name: running-tasks
  namespace: production
spec:
  query: avg:airflow.executor.running_tasks{*}.rollup(max, 60)
YAML
}
Validate the value of a metric by sending a raw GET request to the Kubernetes API server:
kubectl get --raw "/apis/external.metrics.k8s.io/v1beta1" | jq .
Response:
{
  "kind": "APIResourceList",
  "apiVersion": "v1",
  "groupVersion": "external.metrics.k8s.io/v1beta1",
  "resources": [
    {
      "name": "datadogmetric@production:running-tasks",
      "singularName": "",
      "namespaced": true,
      "kind": "ExternalMetricValueList",
      "verbs": [
        "get"
      ]
    }
  ]
}
Create HPA using the DatadogMetric
Next, we will expose executor.running_tasks which will be queried by the HPA.
The HPA fetches executor.running_tasks value from the metrics API and will scale up the airflow-worker if the current running tasks go over 1 task.
Using HPA in combination with cluster autoscaling can help you achieve cost savings for workloads that see regular changes in demand by reducing the number of active nodes as the number of pods decreases.
Here is the set of the configuration in the Helm chart value:
workers:
  enabled: true
  replicas: 1
  resources:
    requests:
      cpu: 800m
      memory: 3.5Gi
  autoscaling:
    enabled: true
    maxReplicas: 2
    metrics:
    - type: External
      external:
        metric:
          name: "datadogmetric@production:running-tasks"
        target:
          type: AverageValue
          averageValue: 1
Conclusion
DatadogMetric allows the HPA to autoscale Airflow’s workers based on statsD metric provided by third-party monitoring systems.
It’s possible to take advantage of these insights and implement them in other areas within your production environment.

In the following, you can see a full working example of how to deploy the Airflow with a helm chart including the HPA and DatadogMetric.
## add this helm repository & pull updates from it
helm repo add airflow-stable https://airflow-helm.github.io/charts
helm repo update
## install using helm 3
helm install \
  airflow \
  airflow-stable/airflow \
  --namespace production \
  --version "8.5.2" \
  --values ./custom-values.yaml
custom-values.yaml can be found: here